Dreaming of a stunning outdoor retreat but worried about the price tag? Your vision of the perfect deck doesn’t have to remain just a dream. The secret lies in embracing maximalist thinking about possibilities while being minimalist about spending. Every surface, every corner, every vertical inch of your outdoor space holds potential for dramatic transformation when you know where to look and how to layer thoughtfully.
The magic happens when you stop thinking about decks as single, expensive purchases and start seeing them as collections of creative solutions. Like curating a gallery wall, building your dream outdoor space becomes about finding the perfect combination of textures, levels, colors, and functional elements that tell your story. Whether you’re working with a tiny balcony or a sprawling backyard, these 23 ingenious deck ideas on a budget will show you how to create an outdoor masterpiece that rivals any high-end installation – all while keeping your wallet happy and your creative spirit soaring.
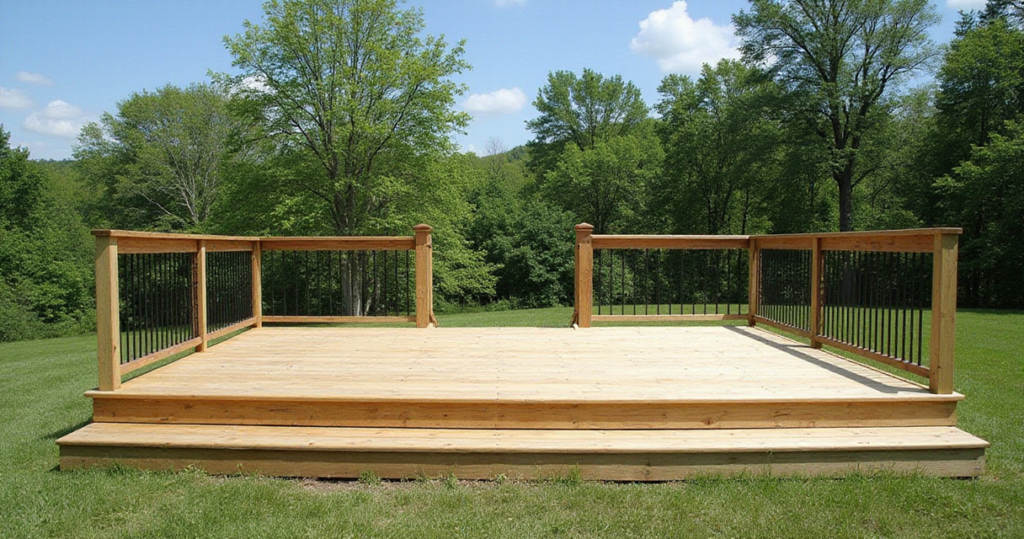
1. Build a Simple Ground-Level Deck to Save Thousands
A ground-level deck represents the most democratizing approach to outdoor living – it’s where ambitious dreams meet practical budgets. Unlike elevated structures that demand complex engineering and deep foundations, these floating platforms rest directly on or close to the ground, eliminating the need for expensive footings and intricate structural attachments. The beauty lies in their simplicity: you can reduce total project costs by 40-60% compared to elevated alternatives, potentially saving thousands while creating a foundation for years of outdoor memories.
The regulatory advantages are equally compelling. Many jurisdictions relax building code requirements for decks under 30 inches in height that aren’t attached to dwellings, often eliminating railing requirements and permit fees entirely. This translates to immediate savings of hundreds in application costs and weeks of waiting time. A 200 square foot ground-level deck can often be completed in a weekend by dedicated DIYers, saving an estimated $2,000-$5,000 in professional labor costs while providing the satisfaction of hands-on creation.
Key Benefits:
- Material costs as low as $5-$15 per square foot versus $25-$50+ for elevated decks
- Simplified foundation using pre-cast concrete blocks instead of deep footings
- Potential permit exemptions for structures under 30 inches
- Weekend completion timeline for most DIY builders
The construction process begins with strategic site preparation and precise planning. Design for standard lumber lengths to minimize waste, then clear and level your chosen area before laying a foundation of compacted gravel topped with concrete deck blocks. The frame construction follows traditional methods but without the complexity of ledger boards or deep post anchoring.
What makes this collection of materials truly sing together is how each element serves multiple purposes while maintaining visual harmony…
2. Utilize Concrete Blocks for a Quick, Stable Deck Base
Concrete deck blocks transform the typically complex foundation phase into an afternoon project, offering pre-cast convenience with professional-grade stability. These ingeniously designed footings feature slots that directly accept deck joists, creating a non-permanent yet robust foundation system that’s perfect for ground-level installations. The time savings alone make them invaluable – a typical 100 square foot deck base can be established in just 2-4 hours, accelerating your entire project timeline by up to 80%.
The financial impact is equally impressive, with concrete blocks reducing foundation costs by 50-70% compared to traditional poured footings. At $8-$20 per block, you can establish a complete foundation for a small deck for under $150, eliminating the need for excavation equipment, concrete mixing, and specialized installation tools. This accessibility means over 90% of homeowners can tackle the foundation work themselves, further multiplying the savings potential.
Essential Installation Steps:
- Excavate 4-6 inches deep and install compacted gravel base
- Position blocks according to joist spacing requirements
- Use laser level for precise elevation matching
- Integrate joists directly into block slots with appropriate connectors
The key to long-term success lies in meticulous site preparation. Proper drainage and a well-compacted gravel base prevent the settling and frost heave issues that can compromise stability over time. The blocks work best for freestanding structures not exceeding 12-18 inches in height, where their inherent stability characteristics shine.
The foundation you’ve just created becomes the canvas for exploring even more creative base solutions…
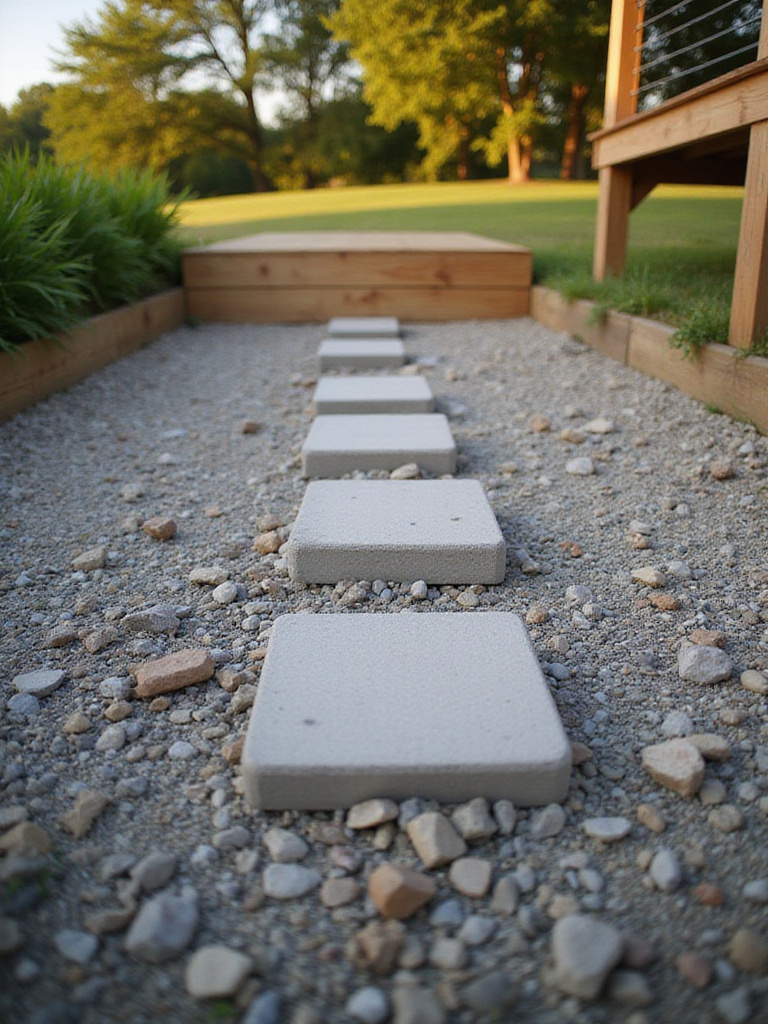
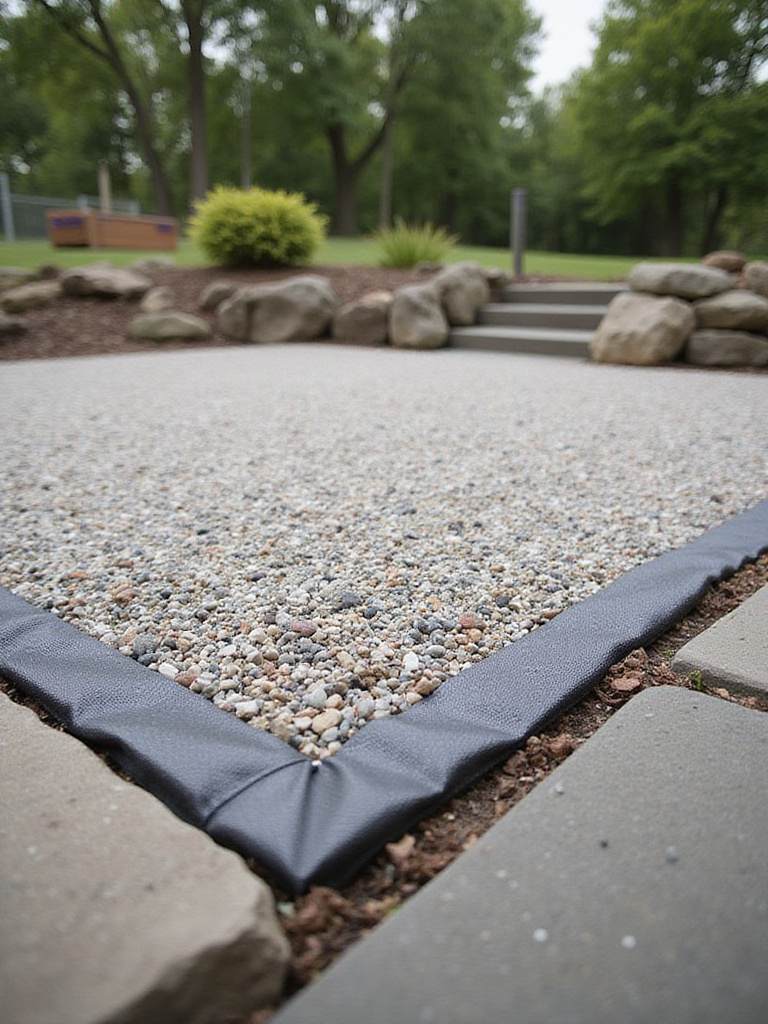
3. Lay an Affordable Gravel Base for a Stylish Patio Deck
A professionally prepared gravel base offers the perfect marriage of functionality and style, creating a permeable foundation that actively prevents the water issues plaguing solid concrete installations. This approach bypasses expensive concrete work entirely while providing superior drainage characteristics that extend your deck’s lifespan and reduce maintenance headaches. The environmental benefits are substantial too – 100% of rainwater infiltrates naturally, supporting better stormwater management.
The cost advantages are striking: a 100 square foot gravel base typically costs $200-$500 for materials, compared to $600-$1,200 for concrete slabs or $1,000-$2,500+ for traditional deck footings. Installation speed matches the savings – most 10×10 foot areas can be completed in 1-2 weekends, significantly faster than waiting for concrete to cure and without the weather-dependent scheduling constraints.
Professional Installation Sequence:
- Clear area and excavate 4-8 inches deep (deeper in frost-prone climates)
- Install sturdy perimeter edging to contain materials
- Layer permeable landscape fabric with generous seam overlaps
- Add and compact 4-6 inch coarse gravel layer using plate compactor
The compaction phase cannot be overstated in importance – hand-tamping simply won’t achieve the density necessary for long-term stability. Renting a plate compactor for larger areas is non-negotiable for professional results, ensuring your base won’t shift or settle over time.
Beyond practical benefits, this stable foundation opens up exciting possibilities for surface treatments that add both durability and visual sophistication…
4. Create a Durable Deck Surface with Affordable Pavers
Transforming your deck surface with pavers represents a revolutionary approach to outdoor flooring, leveraging your existing structure to support lightweight, maintenance-free materials that outlast traditional decking by decades. This innovative technique creates a patio-like surface with superior durability, weather resistance, and design flexibility, all while reducing long-term maintenance to occasional sweeping and rinsing.
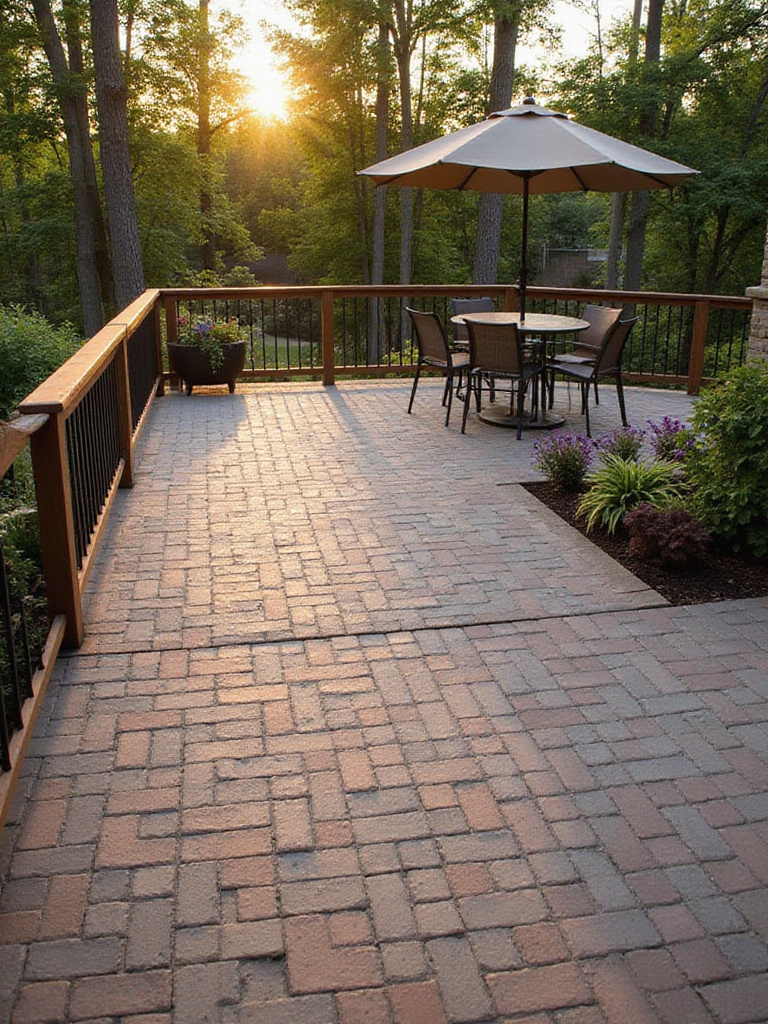
The material cost comparison reveals significant savings potential, with lightweight porcelain pavers often costing 20-50% less per square foot than premium composite decking. More importantly, their 30+ year lifespan compared to wood’s typical 10-15 years means dramatically reduced replacement costs over time. The elimination of annual staining, sealing, and board replacement makes this a true “set it and forget it” solution.
Paver Selection Criteria:
- Choose 2cm porcelain or thin concrete pavers for weight reduction
- Verify existing deck structure can support additional 8-15 lbs/sq ft
- Select materials specifically designed for elevated applications
- Consider adjustable pedestal systems for precise leveling
Implementation requires careful structural assessment and proper base preparation. Adjustable pedestal systems offer exceptional flexibility, creating convenient utility cavities while allowing precise leveling across uneven surfaces. The installation process transforms complex decking projects into straightforward placement exercises.
While pavers offer incredible durability, sometimes the most creative solutions come from the most unexpected sources…
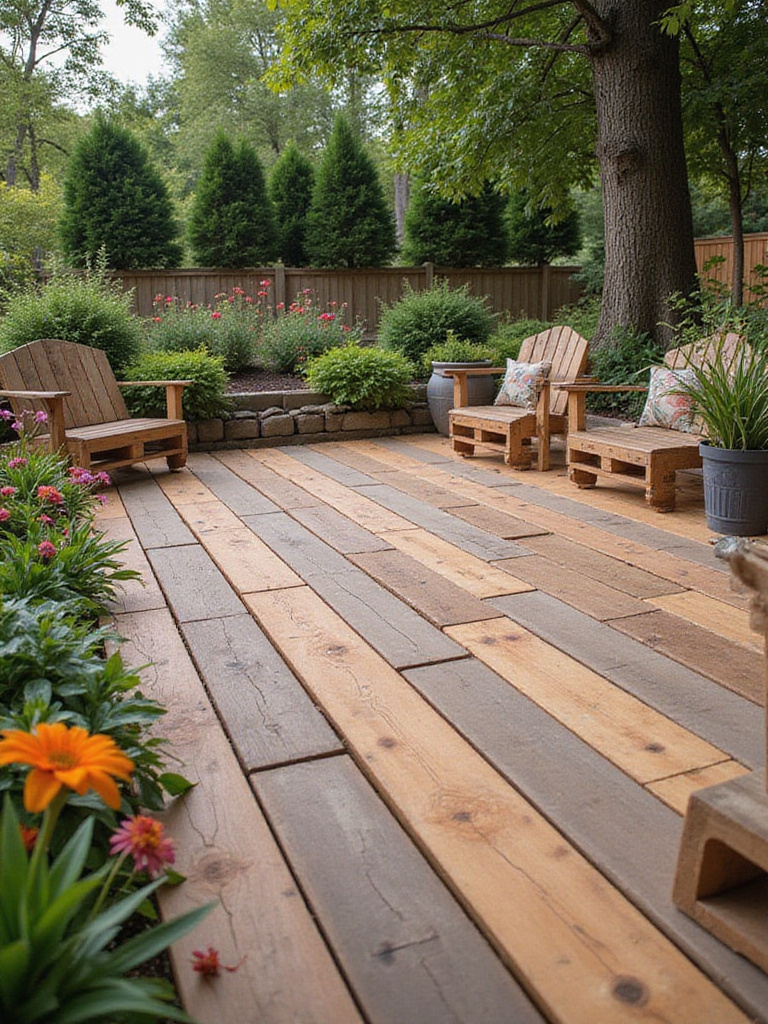
5. Transform Free Pallets into Unique Deck Flooring
The transformation of discarded wooden pallets into distinctive deck flooring represents the ultimate intersection of creativity, sustainability, and budget consciousness. This approach can reduce material costs by an astounding 95-100% compared to traditional treated lumber, potentially saving hundreds to thousands of dollars while creating a uniquely characterful surface that new, uniform lumber simply cannot replicate.
Safety considerations are paramount when sourcing pallets – always verify the “HT” (heat-treated) stamp and avoid “MB” (methyl bromide) marked pallets due to toxic pesticide treatments. With approximately 400-500 million wooden pallets discarded annually in the U.S., the resource availability makes this an accessible option for most homeowners willing to invest time in preparation and assembly.
Pallet Preparation Process:
- Source only “HT” stamped pallets free of chemical stains
- Disassemble using reciprocating saw or pallet buster tool
- Sand all surfaces thoroughly to prevent splinters
- Remove all nails and fasteners completely
The aesthetic achieved is genuinely one-of-a-kind, with inherent imperfections and varied wood tones creating character impossible to purchase. Proper preparation including thorough cleaning, sanding, and multiple coats of exterior-grade sealant ensures longevity despite the reclaimed nature of the materials.
The rustic charm of pallet wood pairs beautifully with another budget-friendly transformation technique that can revitalize existing surfaces…
6. Revitalize Old Deck Boards with a Fresh Coat of Paint
A strategic paint application can dramatically transform weathered deck boards, extending their functional lifespan by 3-5 years while providing complete color customization to match your home’s exterior palette. This approach reduces renovation costs by 50-70% compared to full board replacement, with material costs for a 200 square foot deck typically ranging from $300-$700 versus $2,000-$5,000+ for complete replacement.
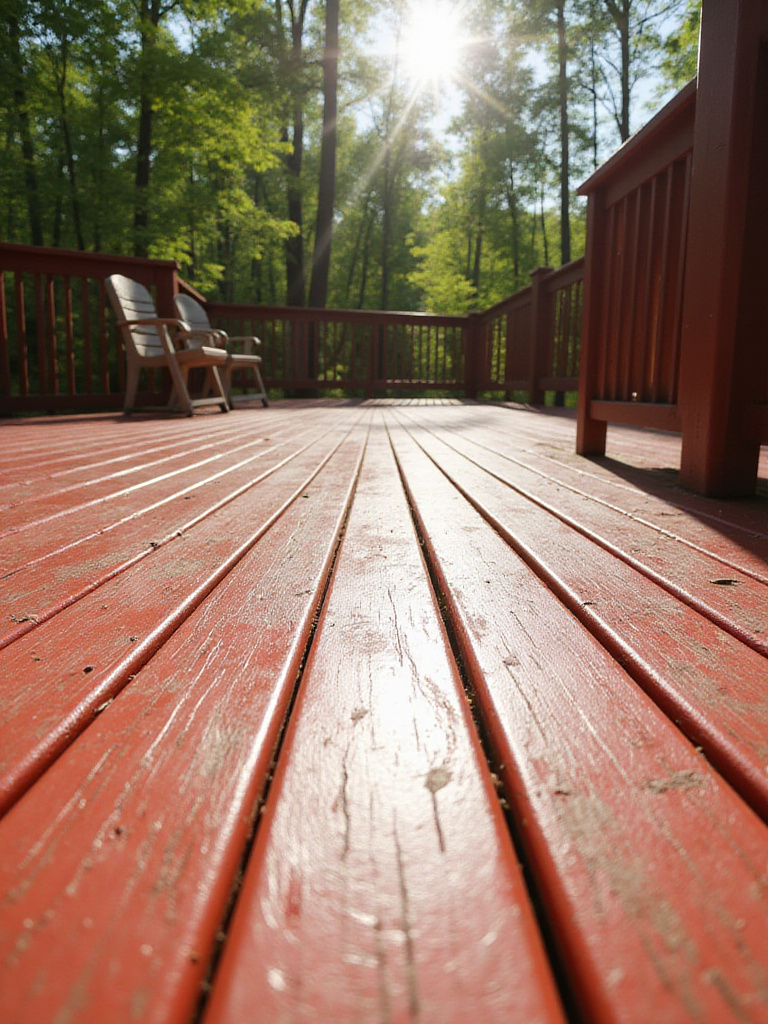
The protective benefits extend far beyond aesthetics, creating a robust barrier against moisture, UV rays, and rot that can significantly delay major renovation needs. The average ROI of 70-80% at resale makes this one of the most financially sound outdoor improvements, dramatically boosting curb appeal for minimal investment.
Surface Preparation Requirements:
- Power wash with deck cleaner solution and allow 48-hour drying
- Repair loose fasteners and damaged boards before painting
- Sand rough areas with 60-80 grit paper for smooth finish
- Apply exterior wood primer for optimal paint adhesion
The key to professional results lies in meticulous preparation – surface prep represents 80% of a successful paint job according to industry experts. Back-brushing or back-rolling after initial application ensures superior penetration and uniform coverage that extends the finish’s durability.
Sometimes the most dramatic transformations don’t require building anything new at all – they simply require seeing existing surfaces with fresh eyes…
7. Stencil Your Concrete Patio for a Faux Deck Look
The art of concrete stenciling offers an ingenious solution for achieving high-end deck aesthetics at a fraction of traditional costs, transforming plain concrete surfaces into convincing wood-look installations. This technique delivers the warmth and visual appeal of timber decking for less than 15-20% the cost of actual deck installation, potentially saving thousands while requiring only basic DIY skills and readily available materials.
Beyond immediate cost savings, stenciled surfaces require minimal ongoing maintenance – occasional cleaning and re-sealing every 3-5 years compared to annual wood deck maintenance. The protective layer actually enhances concrete durability while providing UV protection and weather resistance that extends the underlying surface’s lifespan.
Stenciling Process Overview:
- Clean and repair concrete surface thoroughly before beginning
- Apply high-quality primer in one to two coats for proper adhesion
- Secure stencil patterns using painter’s tape or spray adhesive
- Apply paint in thin, even coats to prevent bleed-through
The realistic effect comes from layering multiple paint shades within stencil patterns, creating depth and variation that mimics natural wood grain. Quality materials – especially primer and sealer – form the backbone of project durability, ensuring your faux finish withstands years of weather exposure.
While stenciling creates the illusion of premium materials, sourcing actual reclaimed materials can provide authentic character at budget-friendly prices…
8. Source Reclaimed Wood for Unique, Rustic Deck Accents
Reclaimed timber brings unparalleled character and historical depth to deck projects, offering cost savings of 30-50% compared to premium hardwoods while supporting environmental sustainability through material reuse. Each piece carries its own story through natural patina, weathering marks, and unique grain patterns that new lumber simply cannot replicate, instantly elevating your deck’s aesthetic appeal and creating genuine conversation pieces.
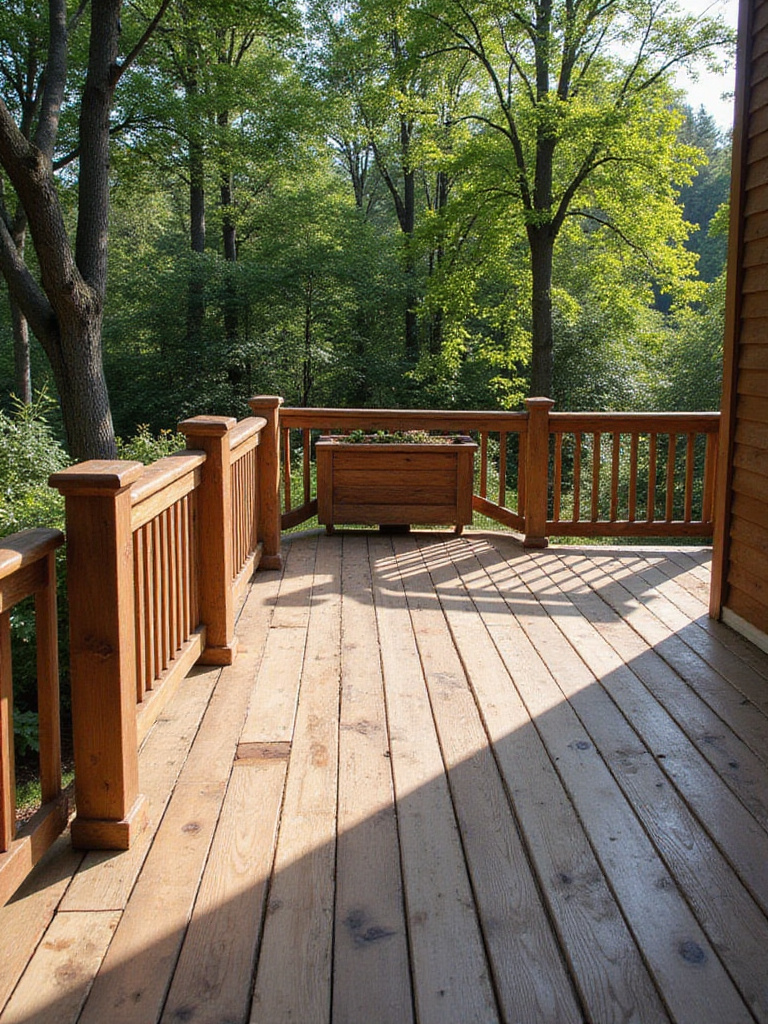
The superior density and durability of many old-growth reclaimed timbers often outperform newly harvested alternatives when properly prepared and maintained. This inherent quality, combined with the distinctive visual character, frequently results in 5-15% increases in perceived property value, making reclaimed wood both a financial and aesthetic investment.
Sourcing and Preparation Guidelines:
- Research local salvage yards, demolition sites, and online marketplaces
- Inspect thoroughly for structural integrity, rot, and pest infestations
- Clean, de-nail, and sand surfaces while preserving character marks
- Apply appropriate outdoor sealants to protect against weathering
The beauty of reclaimed materials lies in embracing their imperfections rather than trying to make them look new. Hidden nails can damage tools, so using an adjustable metal detector during preparation prevents costly saw blade replacement and ensures safety during processing.
The character-rich accents you’ve created deserve equally thoughtful seating solutions that maximize both function and budget efficiency…
9. Integrate Built-In Bench Seating to Maximize Space
Built-in bench seating represents one of the most space-efficient and cost-effective approaches to deck furnishing, eliminating bulky freestanding furniture while providing ample seating capacity. This integrated approach can increase seating by 30-50% compared to individual chairs while costing 20-40% less than purchasing equivalent weather-resistant outdoor furniture, making every square foot of deck space work harder.
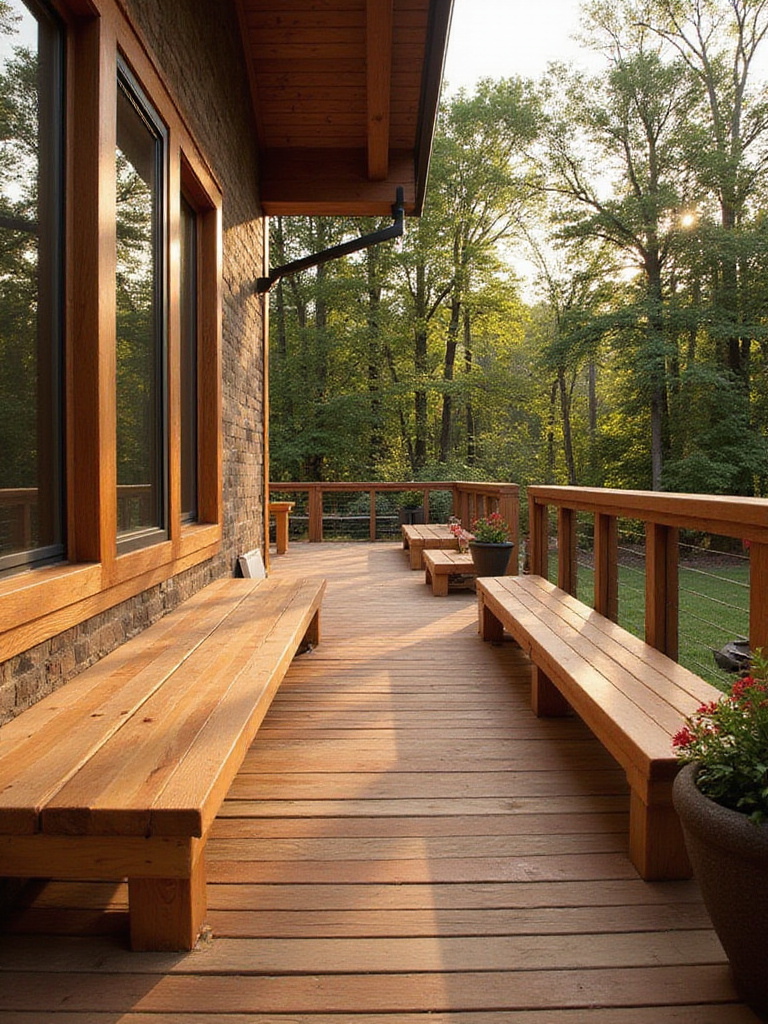
The architectural benefits extend beyond mere cost savings – built-in seating creates a more permanent, intentional feel that defines spaces and encourages social interaction in ways freestanding furniture often cannot achieve. The durability advantages are substantial too, as benches constructed from the same weather-resistant materials as your deck require minimal maintenance while withstanding years of outdoor exposure.
Design and Construction Considerations:
- Plan for standard comfortable dimensions (18-20″ high, 18-24″ deep)
- Build sturdy frames anchored securely to deck joists or ledger boards
- Match decking materials for visual cohesion and weather resistance
- Incorporate hinged tops or integrated planters for multi-functionality
The key to successful built-in seating lies in adequate structural support – inadequate anchoring leads to sagging and safety issues over time. Multi-functional designs with storage compartments or integrated planters maximize utility while maintaining clean visual lines.
The seating you’ve created can be perfectly complemented by custom furniture pieces that extend your deck ideas on a budget theme throughout the space…
10. Craft Custom Outdoor Furniture from Repurposed Pallets
Creating custom outdoor furniture from repurposed pallets combines exceptional cost savings with unlimited design flexibility, allowing you to furnish your entire deck for under $200 while achieving a cohesive aesthetic that perfectly fits your space. This sustainable approach diverts approximately 50-70 pounds of wood per pallet from landfills while creating conversation-starting pieces that reflect current trends in industrial design and sustainable living.
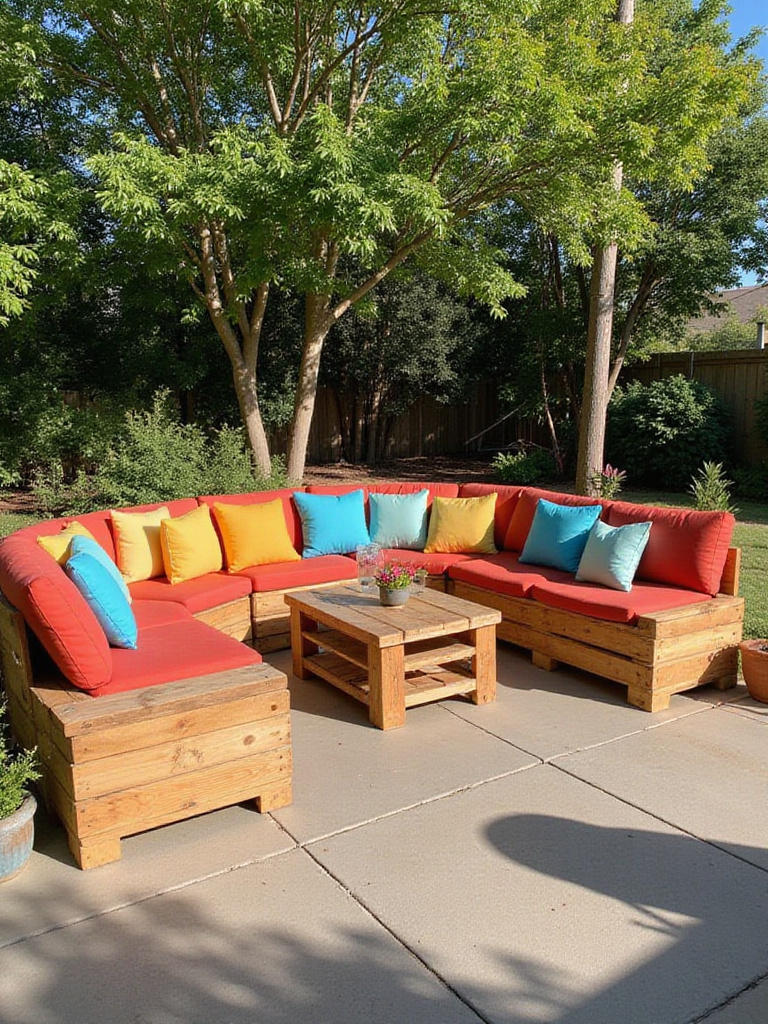
The modular nature of pallet construction enables custom dimensions and configurations impossible to find in retail furniture, ensuring perfect fit within your deck’s unique layout. With proper preparation and finishing, pallet furniture can provide years of comfortable outdoor use while maintaining its distinctive character and rustic appeal.
Safety and Preparation Protocol:
- Source only heat-treated (“HT”) pallets avoiding toxic “MB” markings
- Disassemble carefully using reciprocating saw or specialized pallet tools
- Sand all surfaces extensively from 60-grit through 220-grit progression
- Apply multiple coats of marine-grade exterior finish for weather protection
The construction process transforms simple stacking and securing techniques into sophisticated furniture pieces. Quality outdoor cushions become the crucial comfort element – while pallet frames cost almost nothing, investing in weather-resistant cushions ensures usability and extends the furniture’s functional lifespan.
Sometimes the most impactful transformations come not from building new pieces, but from reimagining existing furniture with fresh approaches…
11. Refurbish Old Furniture with Paint and Outdoor Fabric
The transformation of thrifted or existing furniture through strategic painting and reupholstering represents one of the most cost-effective approaches to deck furnishing, reducing acquisition costs by 70-90% while achieving completely customized aesthetics. This sustainable practice diverts furniture from landfills while creating bespoke pieces tailored precisely to your deck’s color scheme and design theme.
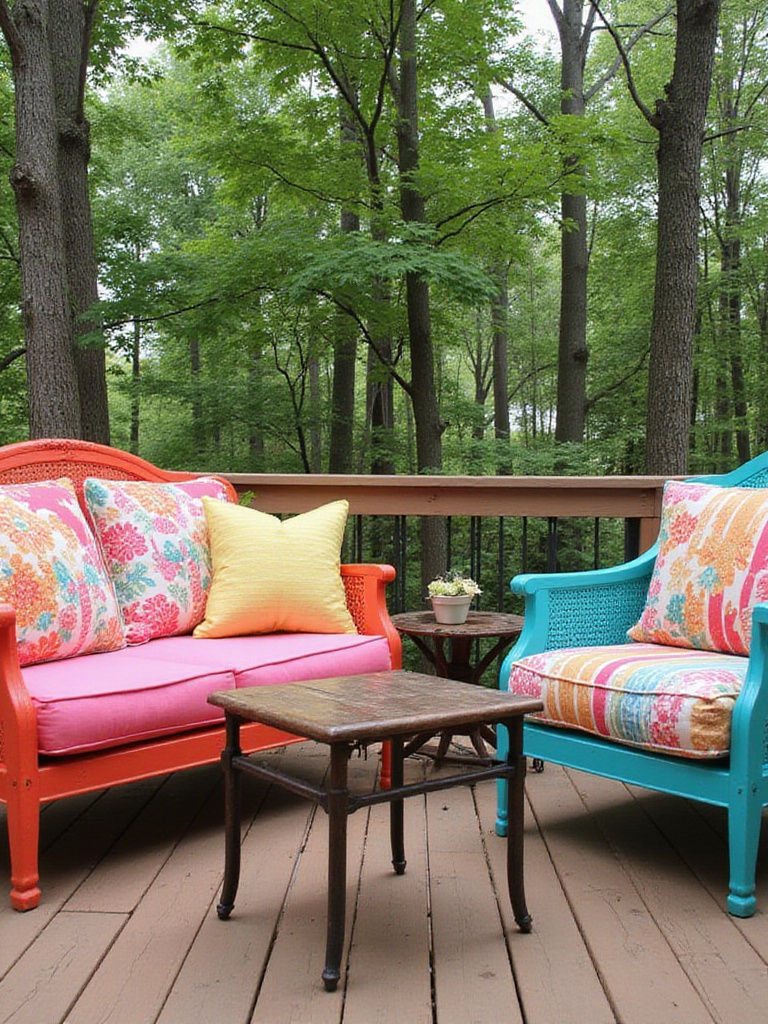
Beyond immediate savings, refurbished furniture offers complete control over style, pattern, and color coordination, ensuring cohesive visual flow throughout your outdoor space. The customization potential means you can achieve designer-level coordination impossible with mass-produced retail furniture, creating a truly personalized outdoor room.
Refurbishment Process Steps:
- Clean and assess furniture structure, repairing any damage before proceeding
- Sand surfaces thoroughly to ensure proper paint adhesion
- Apply rust-inhibiting primer for metal or exterior primer for wood
- Choose UV-resistant, solution-dyed acrylic fabrics for maximum durability
The critical factor in long-term success lies in using outdoor-specific materials throughout the process. Indoor paints and fabrics deteriorate rapidly in exterior conditions, negating initial savings through premature failure. Marine-grade sealants and weather-resistant fabrics ensure your refurbished pieces withstand years of outdoor exposure.
Your beautifully furnished deck deserves equally thoughtful safety features that complement rather than compromise your deck ideas on a budget aesthetic…
12. Install Stylish Wire Railings for Modern, Affordable Safety
Wire railings deliver contemporary sophistication while providing essential fall protection at costs significantly below glass panel systems or elaborate custom metalwork. These minimalist barriers maximize scenic views and create an open, airy feel that can increase perceived deck size by up to 20%, making them ideal for smaller spaces where visual flow is paramount.
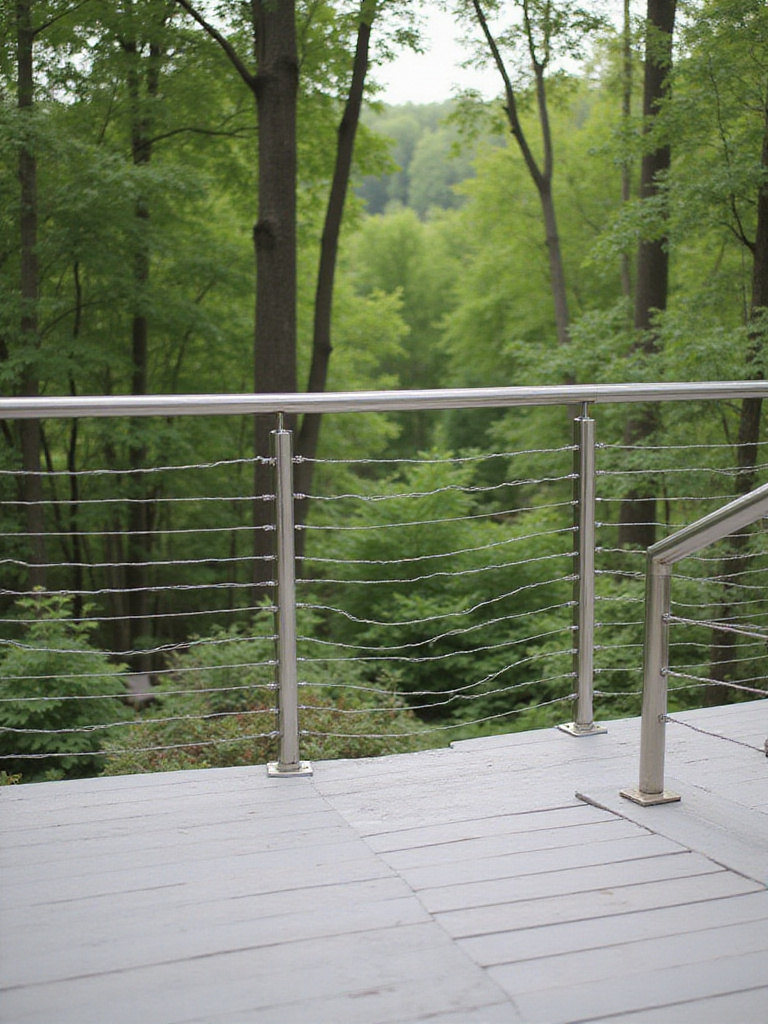
The cost comparison is compelling – DIY cable railing systems typically range from $20-$40 per linear foot compared to $70-$150+ for glass panels, representing substantial savings on longer runs. The durability of marine-grade stainless steel components ensures 20+ year lifespans with minimal maintenance requirements, making this an excellent long-term investment.
Installation Requirements:
- Plan post spacing at 3-6 feet intervals for proper cable tension
- Ensure design meets building codes for height and infill spacing
- Select marine-grade (316) stainless steel for superior corrosion resistance
- Use tension gauges to achieve proper cable tautness without over-stressing posts
Proper tensioning represents the critical success factor – under-tensioned cables sag and fail safety requirements, while over-tensioning stresses structural elements beyond design limits. Professional-grade cable railing kits include all necessary components and detailed instructions, simplifying installation while ensuring code compliance.
For those seeking even more distinctive character, nautical-inspired alternatives offer charming aesthetics with similar budget advantages…
13. Install Nautical Rope Railings for a Charming Look
Nautical rope railings create distinctive coastal, rustic, or farmhouse aesthetics while delivering 30-60% cost savings compared to traditional railing systems. This unique approach transforms essential safety features into decorative elements that enhance rather than compromise your deck’s visual appeal, making them perfect for homeowners seeking character-rich alternatives to conventional barriers.
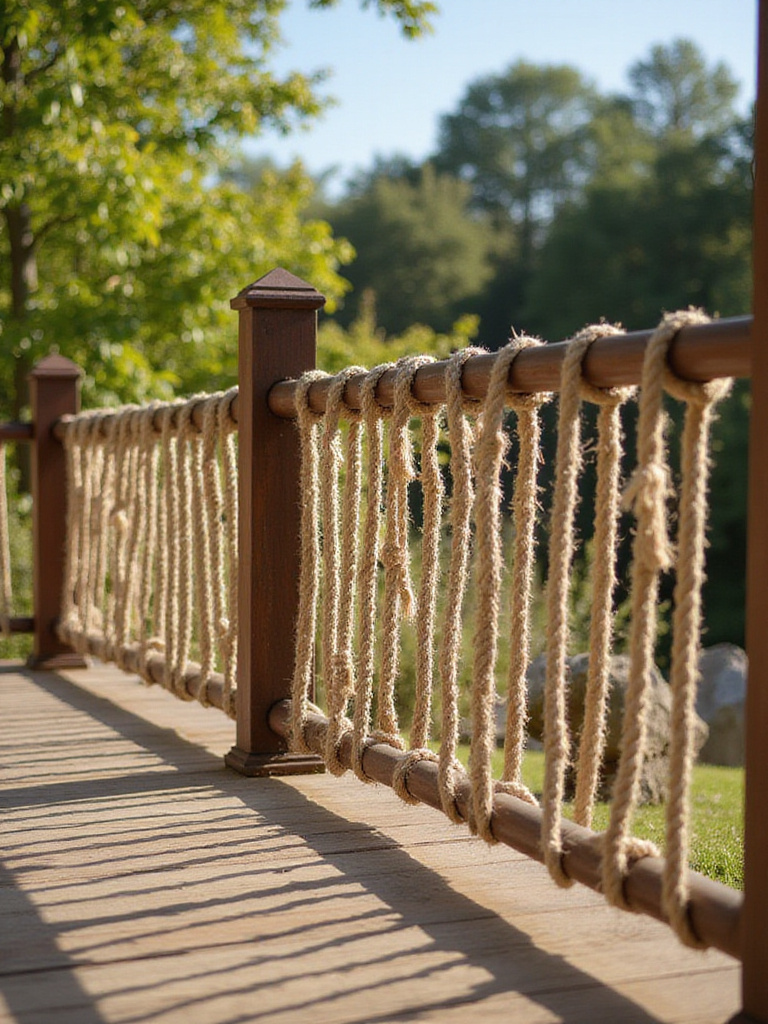
The simplified installation process requires fewer specialized tools and skills than complex baluster systems, further reducing project costs and timeline. High-quality synthetic ropes like Dacron or polypropylene offer superior outdoor durability compared to natural fibers, ensuring long-term performance despite their authentic appearance.
Material and Installation Specifications:
- Plan 2-4 parallel rope runs for 36-inch railing height requirements
- Space support posts 4-6 feet apart to control sag and maintain aesthetics
- Use marine-grade hardware including stainless steel eye bolts and turnbuckles
- Employ rope splicing techniques rather than knots for professional appearance
The key to professional results lies in proper tensioning and quality hardware selection. Turnbuckles allow precise adjustment while thimbles and shackles at connection points ensure long-term durability under weather exposure and normal use stresses.
Sometimes the most effective barriers aren’t traditional railings at all, but creative alternatives that serve multiple functions…
14. Use Large Planters as Decorative, Low-Cost Railing Barriers
Strategic placement of large planters creates effective visual barriers while introducing lush greenery and achieving up to 70% cost savings compared to traditional railing installations. This multi-functional approach combines privacy, aesthetics, and plant growing space into single elements that can be easily rearranged or seasonally updated without permanent structural modifications.
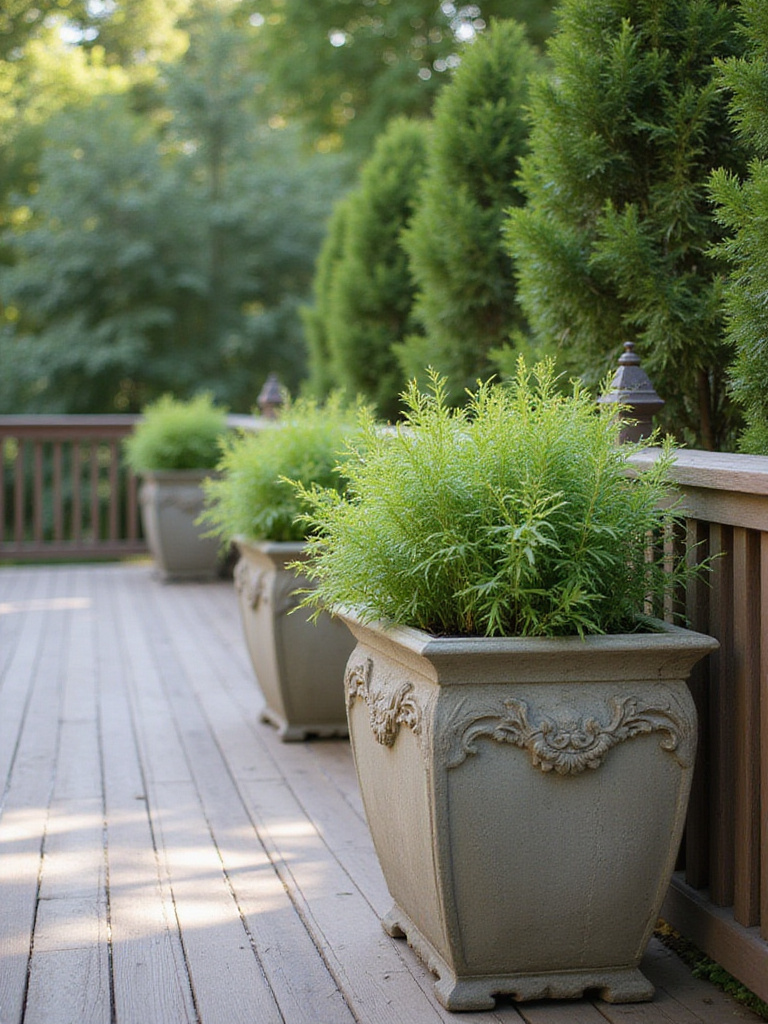
The living barriers provide tangible environmental benefits beyond their decorative value, improving air quality and reducing ambient temperatures through transpiration while offering complete design flexibility. Unlike fixed railings, planter barriers can evolve with changing needs, seasonal plantings, or design preferences.
Implementation Considerations:
- Assess deck load capacity for planters weighing 100-300+ pounds when saturated
- Select weather-resistant containers with adequate drainage systems
- Choose plants appropriate for local climate and available light conditions
- Plan for consistent watering access and maintenance requirements
The visual impact comes from varying planter heights, materials, and plant selections to create dynamic, layered barriers rather than monotonous linear arrangements. Self-watering inserts and automatic irrigation systems can minimize maintenance while ensuring plant health during busy periods or travel.
For even more extensive green coverage, vertical growing systems maximize privacy impact while minimizing floor space requirements…
15. Build a Vertical Planter Wall for Green Privacy
Vertical planter walls transform minimal floor space into extensive green coverage, creating living privacy screens that block 70-80% of sight lines while maximizing growing area in compact deck environments. These innovative installations can provide 15-20 square feet of planting space from just 2-3 square feet of base area, making them ideal for urban settings where space is at a premium.
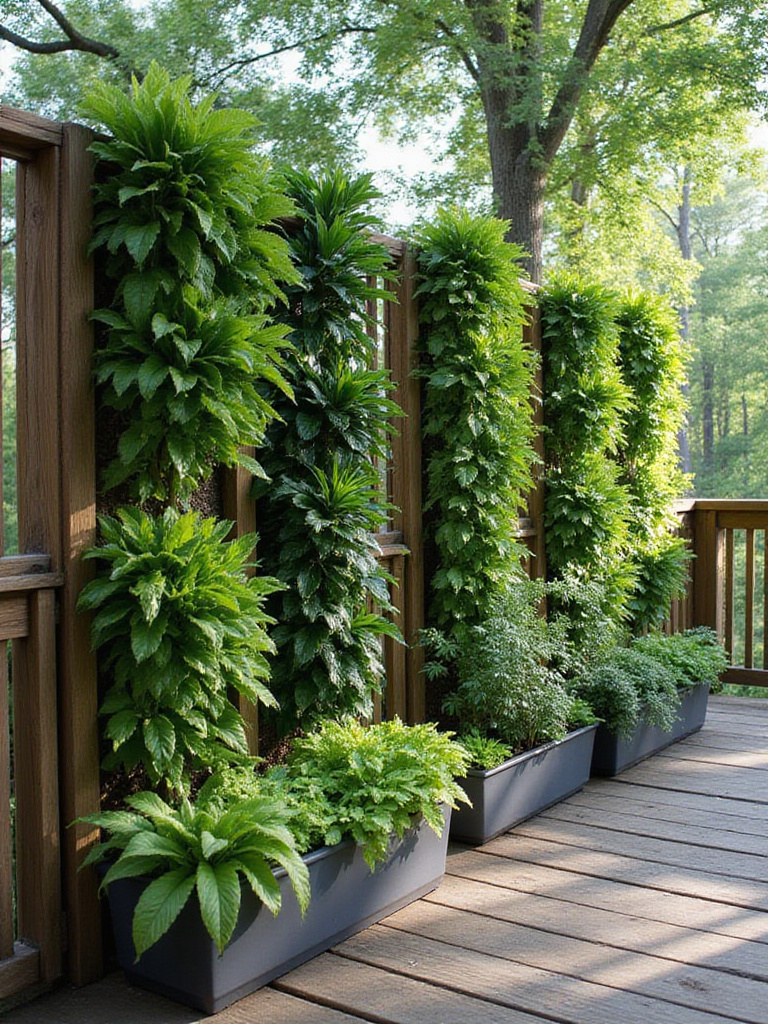
The environmental benefits extend beyond privacy, with living walls reducing ambient temperatures by 1-3°F while filtering airborne pollutants and reducing noise levels by up to 8 decibels. DIY construction using repurposed materials keeps costs between $50-$200, representing 60-80% savings compared to prefabricated privacy screens.
Construction and Planting Guidelines:
- Ensure adequate sunlight exposure and easy watering access
- Use lightweight potting mixes to reduce overall wall weight
- Select fast-growing, dense plants for quick privacy establishment
- Integrate drip irrigation systems for consistent, efficient watering
The structural considerations cannot be overlooked – vertical gardens create significant weight loads that must be properly supported to prevent collapse. Proper anchoring and weight distribution ensure long-term stability while integrated irrigation systems minimize maintenance requirements.
For immediate privacy solutions that don’t require plant establishment time, traditional screening materials offer instant results…
16. Erect an Inexpensive Privacy Screen Using Lattice Panels
Lattice panels provide immediate privacy enhancement with 50-70% cost savings compared to solid fencing, making them ideal for quick deck transformations on tight budgets. The semi-open design maintains natural light and air circulation while creating visual barriers, preventing the claustrophobic feeling often associated with solid screening materials.
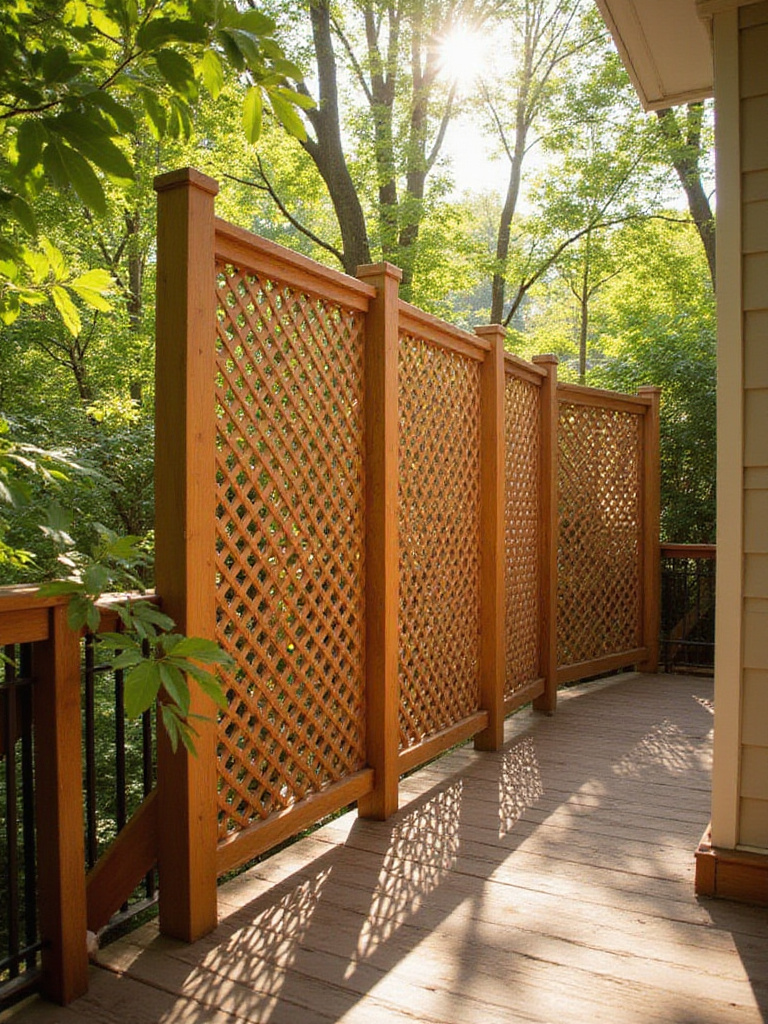
Installation simplicity makes this approach accessible to most DIYers, with complete multi-panel screens achievable in just 4-8 hours using basic tools and minimal specialized skills. The versatility of lattice extends beyond mere screening – it serves as excellent support for climbing plants, effectively doubling its functional and aesthetic value over time.
Installation Process:
- Mark post locations ensuring alignment with deck structure or proper ground anchoring
- Verify local building codes for height restrictions and setback requirements
- Secure posts using concrete footings or heavy-duty deck-mounted bases
- Attach panels with weather-resistant fasteners maintaining level, plumb installation
The key to professional appearance lies in adding finishing touches like decorative top caps and trim pieces around panel edges. While vinyl lattice costs more initially, its maintenance-free characteristics provide superior long-term value in harsh weather conditions.
With privacy established, attention turns to creating ambiance through thoughtful lighting solutions that don’t strain your budget…
17. Illuminate Your Deck with Budget-Friendly Solar String Lights
Solar string lights deliver magical evening ambiance with zero ongoing energy costs, eliminating electrical installation complexity while providing charming illumination that extends deck usability well into the night. These eco-friendly solutions harness daytime solar energy for automatic dusk-to-dawn operation, creating warm, inviting atmospheres for minimal upfront investment.
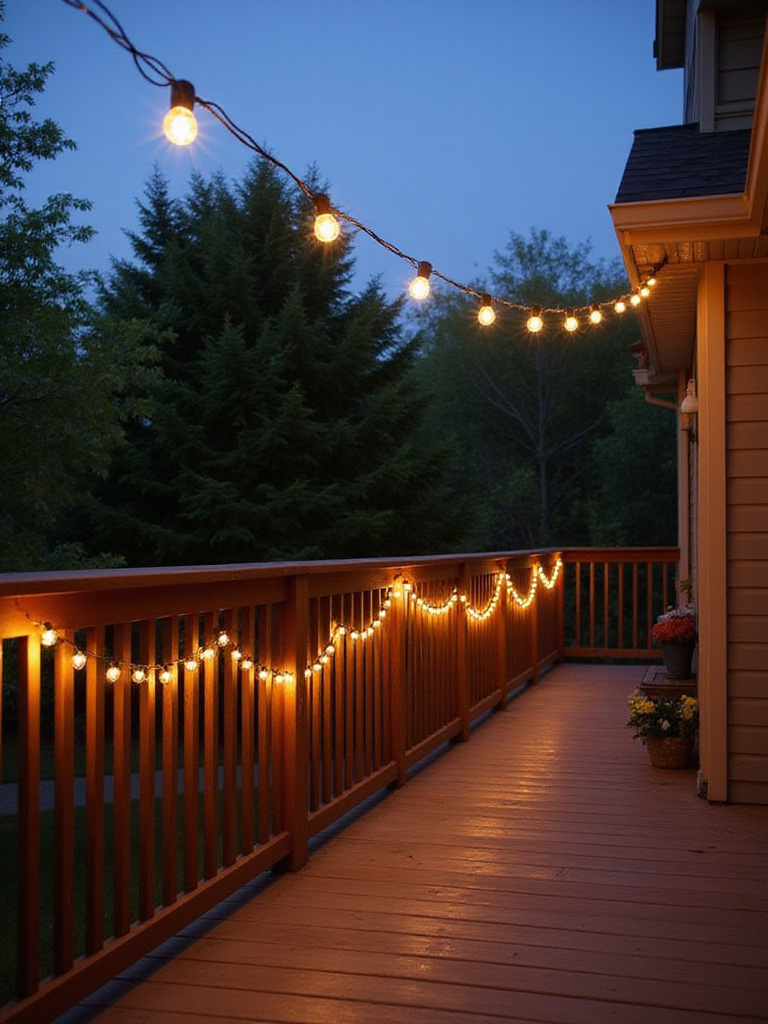
The installation simplicity cannot be overstated – most homeowners complete setup within minutes using basic clips and hooks, requiring no electrical outlets or professional assistance. This accessibility, combined with costs typically under $30-$50 per string, makes comprehensive deck lighting achievable for virtually any budget.
Optimal Installation Practices:
- Position solar panels for 6-8 hours daily direct sunlight exposure
- Plan lighting layout measuring required lengths before purchasing
- Use appropriate outdoor-rated fasteners for secure, weather-resistant mounting
- Clean solar panels regularly to maintain maximum charging efficiency
The performance longevity depends entirely on solar panel positioning and cleanliness – shaded or dirty panels dramatically reduce charging effectiveness and illumination duration. Strategic placement planning ensures consistent performance throughout seasonal sun angle changes.
Beyond lighting, other affordable accessories can dramatically enhance your deck’s comfort and visual appeal…
18. Add Warmth and Definition with Budget-Friendly Outdoor Rugs
Outdoor rugs provide instant zone definition and aesthetic enhancement, transforming open deck spaces into intentionally designed outdoor rooms with clear functional areas. These versatile elements introduce color, pattern, and texture while providing comfortable underfoot surfaces that reduce fatigue and elevate overall comfort levels.
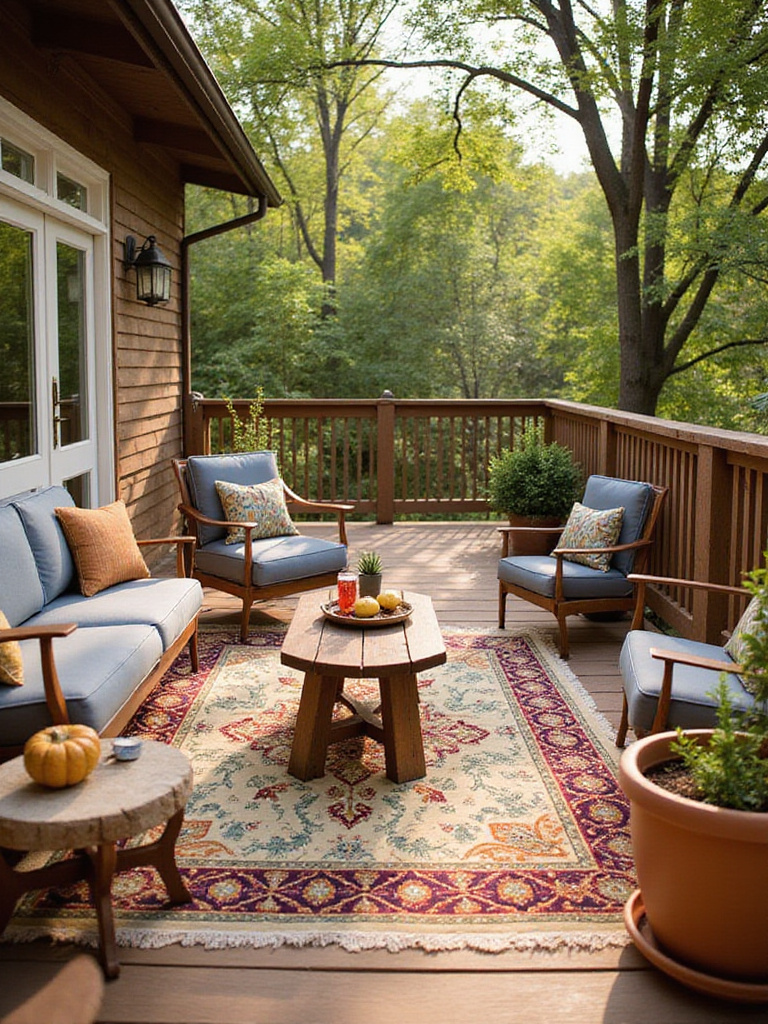
The spatial organization benefits are substantial – properly sized rugs can make small decks feel more purposeful while clearly delineating dining, lounging, or conversation areas on larger spaces. Quality outdoor rugs also protect underlying deck surfaces from UV damage, scratches, and spills, potentially extending deck finish lifespan.
Selection and Placement Guidelines:
- Size rugs to accommodate all furniture legs or at least front legs of larger pieces
- Choose synthetic materials like polypropylene or recycled plastic for weather resistance
- Anchor lightweight rugs with outdoor tape or strategic furniture placement
- Layer smaller patterned rugs over larger solid ones for designer depth
The material selection proves critical for longevity – indoor-only rugs deteriorate rapidly in outdoor conditions, negating cost savings through premature replacement. UV-resistant synthetic fibers maintain color and structural integrity through years of weather exposure.
Rugs provide the foundation for additional decorative elements that bring life and personality to your outdoor space…
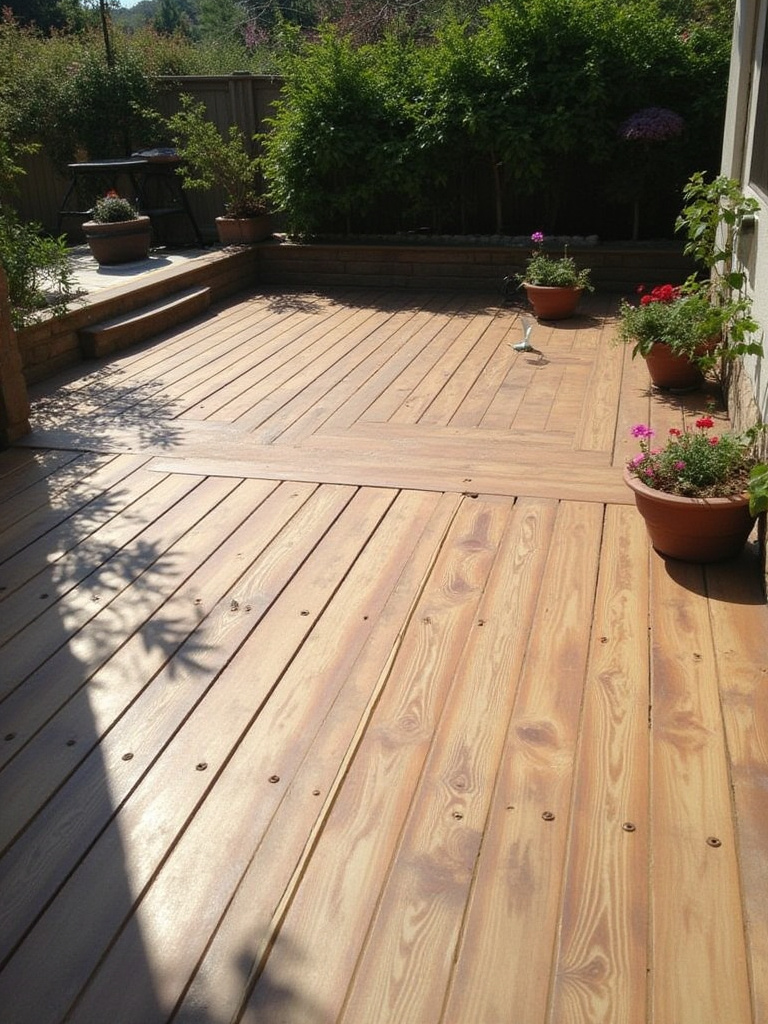
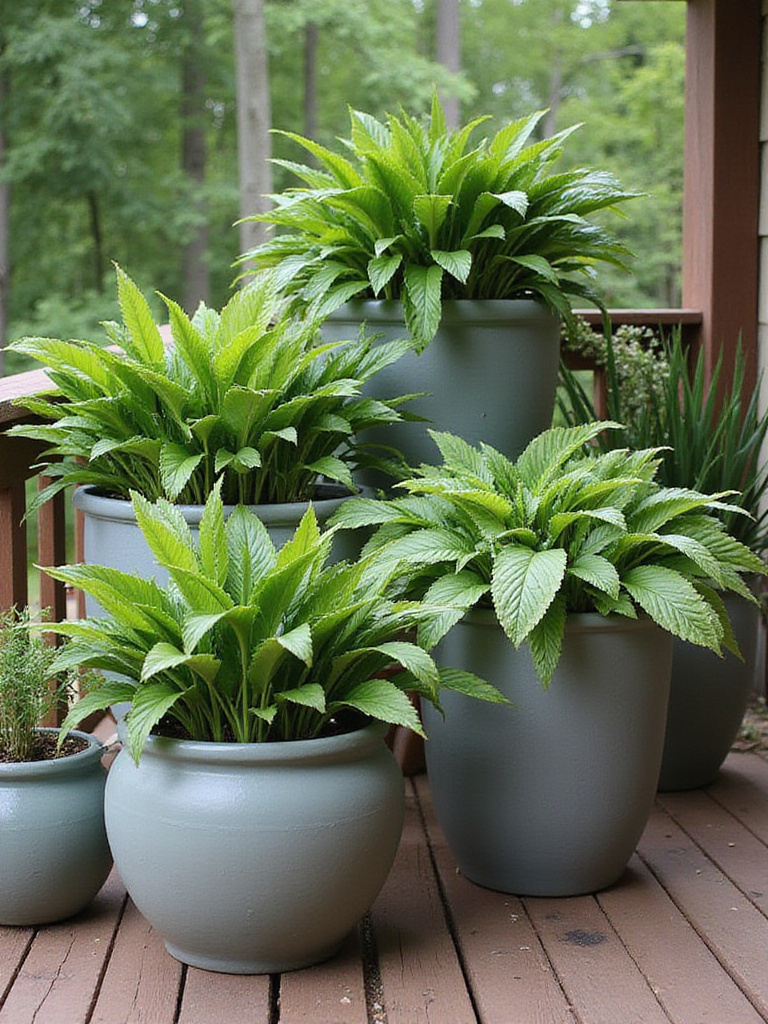
19. Decorate with Large, Affordable Pots and Greenery
Large, strategically placed planters create immediate visual impact while introducing natural cooling effects and air quality improvements to deck environments. These mobile design elements offer unparalleled flexibility for seasonal updates, layout changes, and plant selection evolution, all while achieving 30-50% cost savings compared to built-in planting solutions.
The environmental benefits extend beyond aesthetics, with mature plants naturally cooling surrounding areas by 2-8°F through transpiration while improving air circulation patterns. This natural climate control contributes to more comfortable outdoor living conditions during warm weather periods.
Planter Selection and Arrangement:
- Choose weather-resistant materials with adequate drainage systems
- Focus on fewer, larger containers rather than numerous small pots for maximum impact
- Employ “Thriller, Filler, Spiller” planting method for professional multi-dimensional appearance
- Consider lightweight fillers in pot bottoms to reduce soil costs and container weight
The load considerations become critical on elevated decks where multiple large planters can create significant structural stresses. Proper weight distribution and deck capacity assessment prevent potential structural issues while ensuring safe, long-term installations.
All these beautiful enhancements deserve protection through proper maintenance practices that extend their lifespan…
20. Preserve Your Deck’s Beauty with Affordable Stains and Sealants
Regular staining and sealing represents the most cost-effective method for extending deck lifespan by 5-10 years, effectively delaying expensive replacement projects that can cost thousands. This protective maintenance creates vital barriers against weather, UV rays, and moisture while preserving aesthetic quality and color vibrancy for 2-4 years per application.
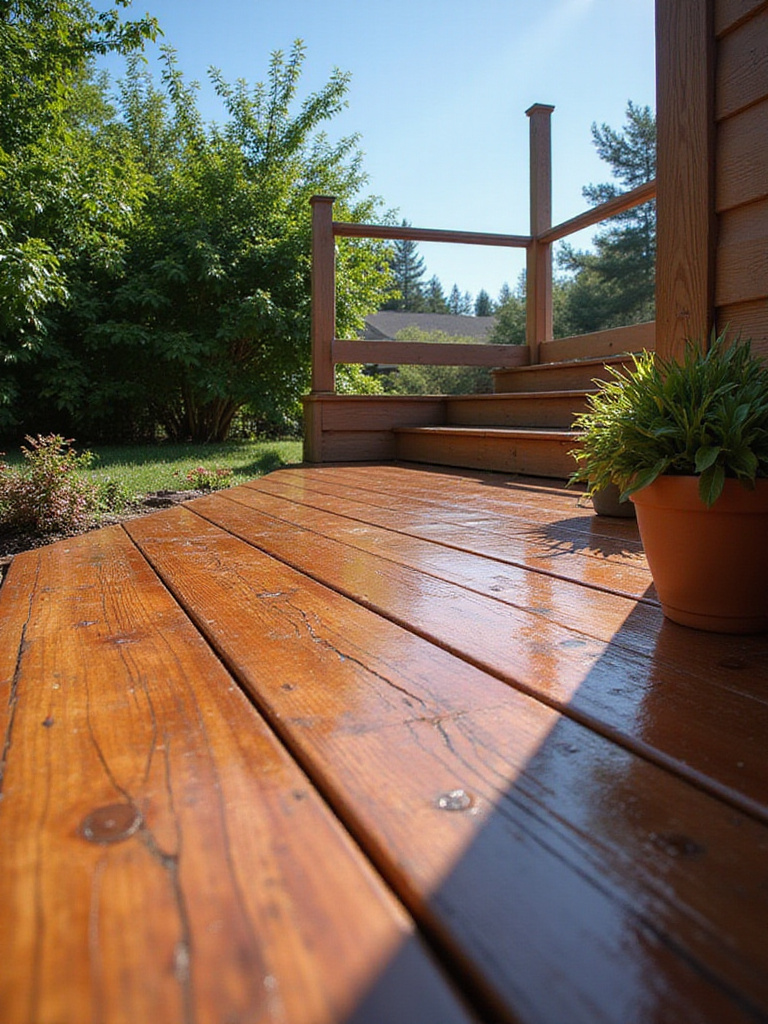
The financial impact is dramatic – annual staining costs of $60-$150 for materials can prevent deck replacement expenses of $4,000-$10,000, representing exceptional return on maintenance investment. Beyond cost avoidance, properly maintained decks retain higher property values and curb appeal throughout their extended lifespans.
Application Process Requirements:
- Clean thoroughly with deck cleaner/brightener allowing complete drying
- Strip old, peeling finishes and sand lightly for optimal adhesion
- Choose appropriate stain type (water-based recommended for DIY applications)
- Apply thin, even coats following grain direction in suitable weather conditions
The preparation phase determines long-term success – 80% of staining effectiveness comes from proper surface preparation rather than product application. Using deck brightener after cleaning neutralizes cleaners while opening wood pores for enhanced stain penetration and vibrancy.
With your deck properly protected, you can focus on creating additional functional spaces that maximize your outdoor living potential…
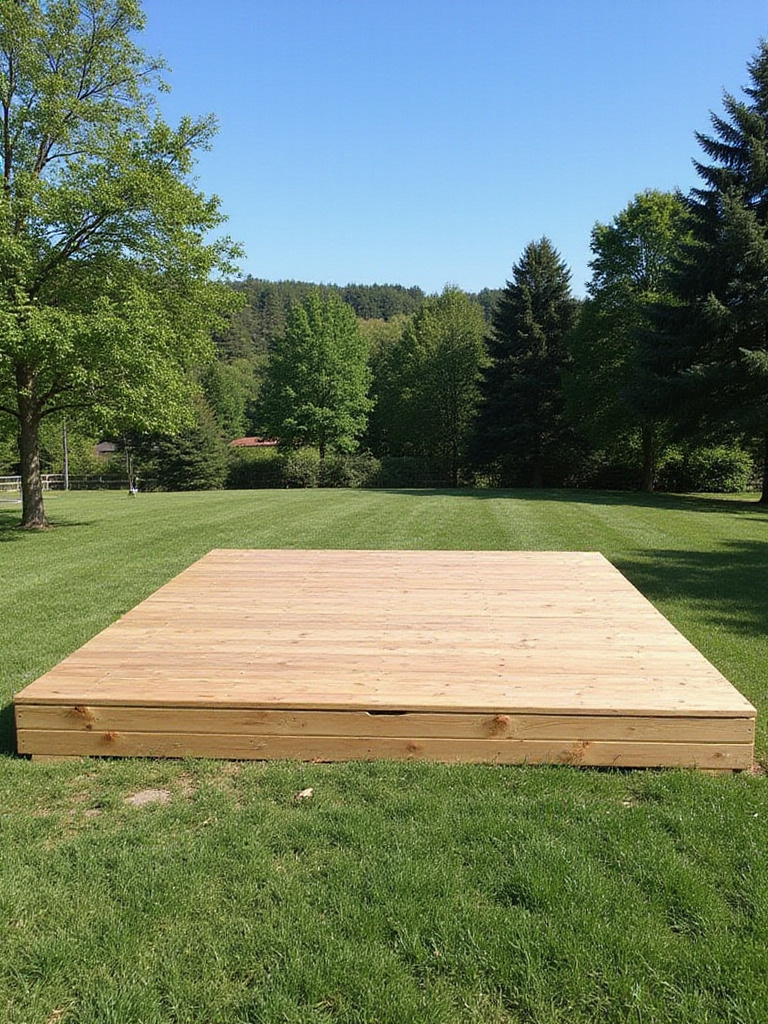
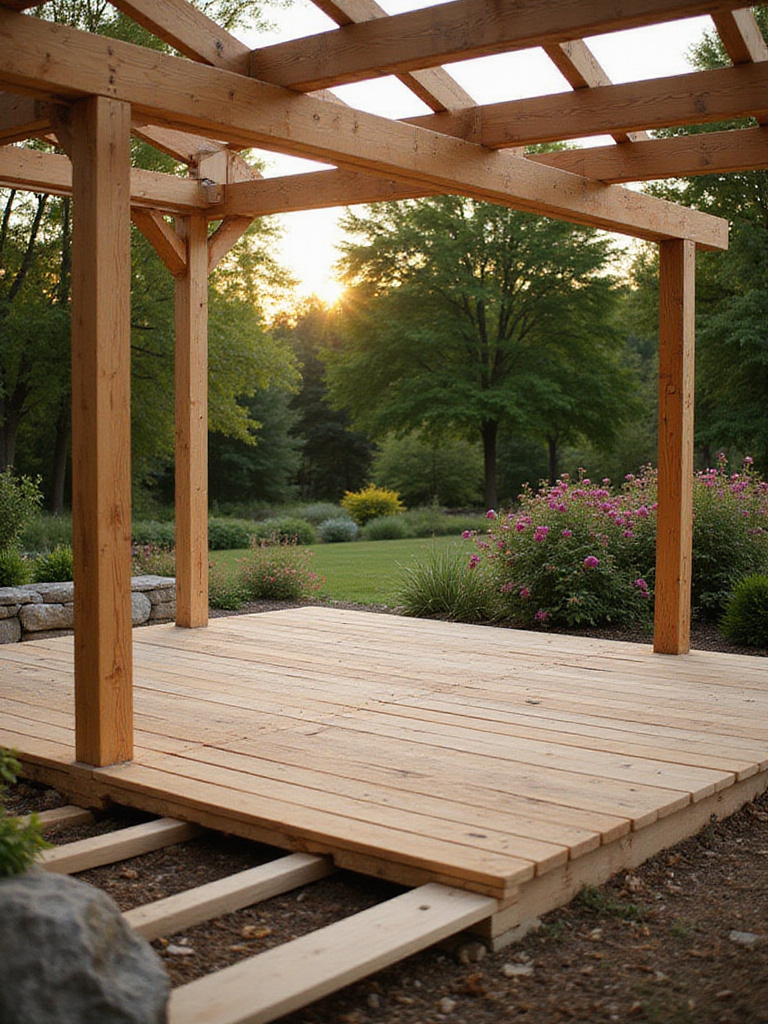
21. Construct a Compact Floating Deck for Instant Enjoyment
Compact floating decks offer immediate outdoor living space creation with minimal site disruption and maximum DIY accessibility, making them perfect for renters or homeowners seeking quick transformations. These unattached, ground-level structures often avoid complex permit requirements while providing stable, functional platforms for relaxation, dining, or entertaining.
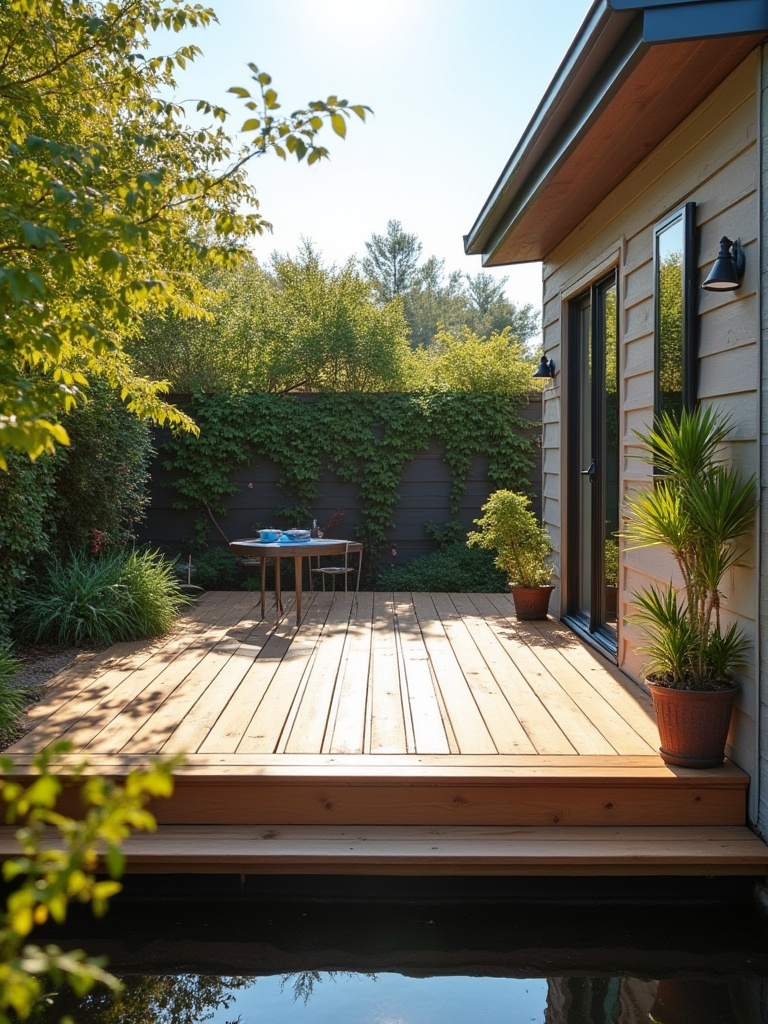
The construction timeline advantages are substantial – most projects complete within 1-2 weekends with material costs typically ranging from $1,000-$2,500 for basic 10×10 installations. This represents 50-70% savings compared to professional installation while providing the satisfaction of hands-on creation and immediate usability.
Construction Sequence:
- Plan dimensions and mark area ensuring proper drainage considerations
- Excavate 4-6 inches deep installing landscape fabric and compacted gravel base
- Position concrete deck blocks according to joist spacing requirements
- Build rectangular frame ensuring level, square construction with appropriate joist spacing
The modular construction approach offers exceptional flexibility – building in smaller, interlocking sections simplifies construction while allowing future expansion or relocation as needs change. This adaptability makes floating decks ideal for evolving outdoor living requirements.
The final element in maximizing your deck ideas on a budget involves strategic timing and purchasing decisions…
22. Buy Discounted Materials During Off-Season Sales for Savings
Strategic material purchasing during off-season periods can achieve 10-25% direct cost savings on major components like lumber, composite decking, and hardware, translating to hundreds or thousands of dollars in project savings. Late fall through early spring typically offers the best pricing as suppliers clear inventory and maintain sales momentum during slower construction periods.
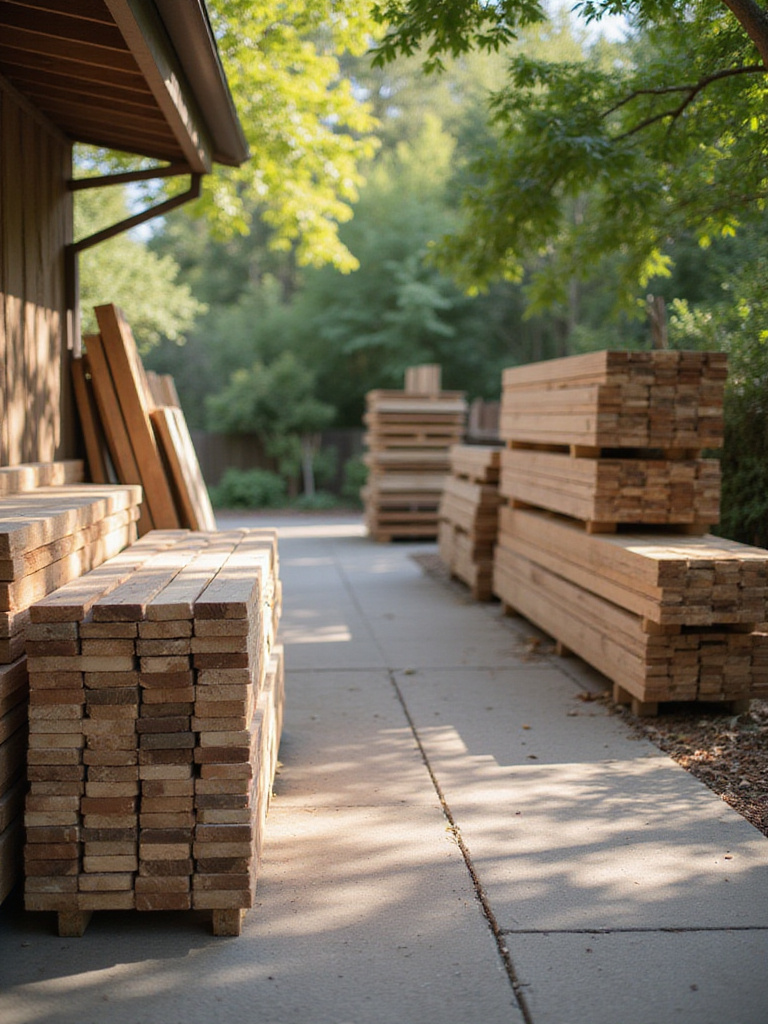
The advantages extend beyond immediate savings – off-season purchasing provides access to wider material selections before popular items sell out, while securing materials well in advance reduces project stress and potential supply chain delays. Building relationships with local lumberyard staff often reveals insider knowledge of upcoming sales and scratch-and-dent deals not publicly advertised.
Strategic Purchasing Approach:
- Monitor retailer newsletters and clearance events during November-March periods
- Calculate precise material needs to avoid over-ordering and storage issues
- Inspect discounted materials thoroughly for damage or defects before purchase
- Ensure adequate dry, secure storage space to protect materials until construction
The storage considerations cannot be overlooked – improperly stored materials can warp, develop moisture damage, or suffer theft, negating initial savings through replacement costs. Proper planning ensures materials remain in optimal condition until construction begins.
For larger projects that seem financially overwhelming, breaking construction into manageable phases makes ambitious dreams achievable…
23. Phase Your Deck Construction to Spread Out Costs
Phased construction transforms seemingly impossible deck projects into manageable financial commitments, spreading $10,000-$30,000 investments over months or years while avoiding high-interest financing costs. This strategic approach reduces upfront capital requirements while allowing design refinement based on real-world use patterns and evolving preferences.
The iterative benefits extend beyond mere cost management – living with basic structures reveals opportunities for design improvements and functional modifications impossible to anticipate during initial planning phases. This organic development often results in 10-20% more satisfying final outcomes compared to single-phase installations.
Recommended Phasing Sequence:
- Phase 1: Comprehensive planning, permitting, and foundation/core structure installation
- Phase 2: Structural framing and basic decking for immediate usability
- Phase 3: Railings, stairs, and essential safety/aesthetic finishes
- Phase 4: Enhanced amenities like built-in seating, lighting, and custom features
The critical success factor lies in comprehensive upfront planning and securing permits for the complete intended structure, even when building in stages. This prevents re-application fees while ensuring each phase integrates seamlessly with future additions.
The creative journey of transforming outdoor spaces on a budget reveals that limitations often spark the most innovative solutions…
Conclusion
These 23 transformative deck ideas on a budget prove that financial constraints need never limit your outdoor living dreams – they simply redirect creativity toward more ingenious solutions. From the foundational wisdom of ground-level construction to the finishing touches of strategic lighting and seasonal plantings, each approach offers a pathway to personalized outdoor luxury that celebrates both resourcefulness and style. The magic lies not in expensive materials or professional installation, but in the artful curation of elements that work together to create spaces far greater than the sum of their parts.
The overarching revelation is that budget-conscious design often yields more character and satisfaction than unlimited spending ever could. When you transform pallets into custom furniture, breathe new life into weathered surfaces, or create privacy through living walls, you’re not just saving money – you’re crafting a space that tells your unique story through thoughtful problem-solving and creative vision. Every dollar saved becomes an opportunity for another layer of personality, another functional enhancement, another reason to spend more time in your transformed outdoor sanctuary.
Your deck transformation journey begins with selecting just one or two ideas that resonate most deeply with your vision and current resources. Start small, embrace the process of gradual enhancement, and watch as your outdoor space evolves into the perfect backdrop for countless memories. The most beautiful decks aren’t those with the highest price tags – they’re the ones that reflect their owners’ creativity, persistence, and joy in the art of outdoor living.